
How to Transfer Inventory Between Stores Using a POS
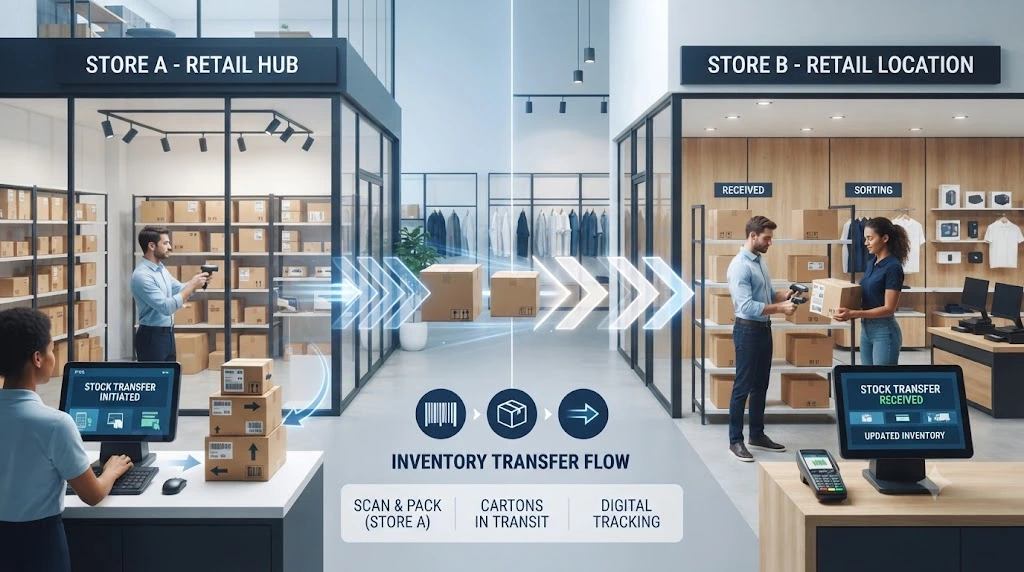
Your busiest store just sold out of a bestseller. Across town, the same product is collecting dust on a shelf. Sound familiar?
Here’s the quick answer. An inventory transfer between stores involves creating a transfer, choosing the source and destination, adding products and quantities, sending the stock, and confirming what arrives at the receiving store. Nine detailed steps follow below. Button names change from one POS to another, but the basic workflow looks similar across most multi-location retail systems.
This guide goes past the clicks. You’ll learn when a transfer makes sense, what happens to stock while it’s on the road, how to fix mismatched counts, and how many units to move in the first place.
What Is an Inventory Transfer Between Stores?
An inventory transfer is a record that moves stock from one of your locations to another. The source location sends it. The destination location receives it.
It isn’t a sale, because no customer is involved. It isn’t a supplier purchase either. It’s your own stock changing address.
Your POS needs that record because its stock counts drive everything else: what shows as available, what triggers a reorder, and what online shoppers can buy. Skip the record, and each store’s numbers slowly drift away from what’s on the shelf.
Still comparing software? Our guide to a multi-location POS system covers that side. For the wider picture, see our overview of retail inventory management.
When Should You Transfer Inventory Between Stores?
A transfer is a tool, not a reflex. These are the situations where it earns its keep.
One Store Has Excess Stock
Slow-moving units tie up cash and shelf space. Moving them to a store where they sell can save you a markdown.
Another Store Is Running Low
If a location is down to its last few units of a fast mover, a transfer is often quicker than waiting for a supplier delivery.
Sales Demand Is Different by Location
The same product can sell very differently across two neighborhoods. Sales reports by location show where each item actually moves.
Seasonal or Promotional Demand
A sale, a local event, or a holiday rush can drain one store faster than the others. Moving stock ahead of the spike beats scrambling after it.
Opening or Restocking a Store
New locations need opening stock. Existing ones need top-ups after a big weekend. Transfers handle both.
How to Transfer Inventory Between Stores Using a POS
Whether you’re sending ten units across town or fifty to another city, the steps are the same. This is the full path for anyone wondering how to transfer inventory between store locations without losing track of a single unit.
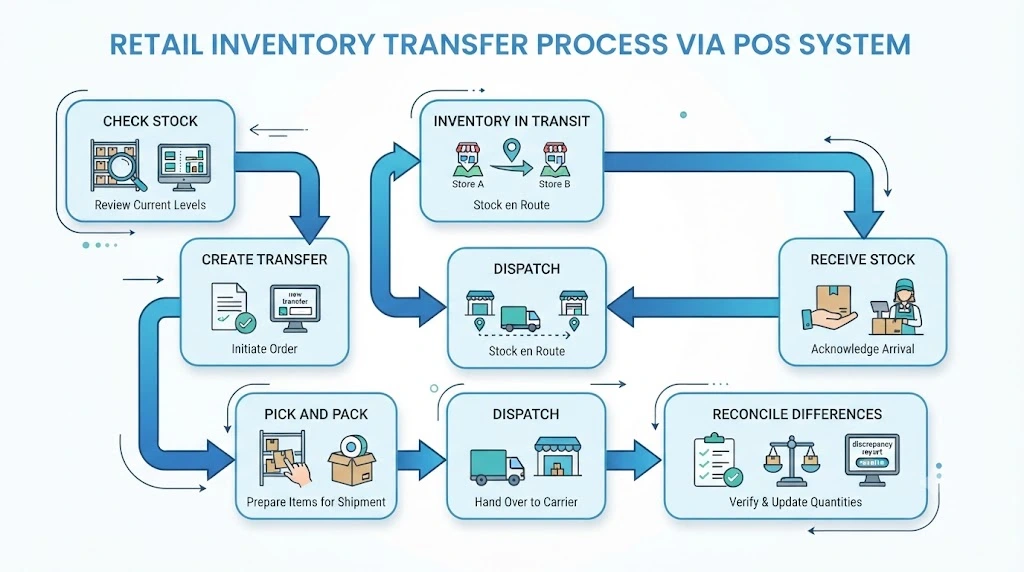
1. Check Stock Levels at Both Locations
Before you create anything, look at the numbers. Check:
- Available inventory at each store
- Committed or reserved inventory (units already promised to customers)
- Recent sales
- Minimum stock levels
- Excess stock at the source
2. Choose the Source and Destination Stores
The source is where the stock leaves from. The destination is where it’s headed. Double-check the order. A flipped transfer is an easy mistake and an annoying one to unwind.
3. Create a Stock Transfer
In many systems you’ll find this under an Inventory or Stock menu, often labeled something like Transfers → New Transfer. Menu names differ from POS to POS, so treat that path as a rough guide, not a rule.
4. Add Products and Quantities
Add each item by:
- SKU
- Product or variant
- Barcode
- Quantity
- Serial number, where applicable
Scanning is faster and safer than typing, especially when variants look alike. That’s where good barcode inventory tracking pays off.
5. Pick and Pack the Inventory
Typing a quantity into the system and putting the right products in the box are two separate jobs. Pick against the transfer list, and have someone check the box before it leaves.
6. Mark the Transfer as Sent or Shipped
This is the step where inventory status can change. In some systems, marking a transfer as sent removes the stock from the source location right away.
7. Track the Inventory While It Is in Transit
Here’s a gap most guides skip. Once inventory leaves the source but hasn’t been received at the destination, the stock may be tracked as in transit, incoming, committed, or another status, depending on the POS. What matters is knowing when your system removes stock from the source and when it makes that stock available at the destination.
Lightspeed’s X-Series help article says sending a transfer removes the stock from the source outlet, and receiving it adds the stock at the destination. Square’s flow for transferring stock is different: you complete the transfer in a single step. Shopify’s help center, meanwhile, describes transfers that can be marked in transit, ready to ship, or transferred. Check how your own system handles it before you rely on its numbers.
8. Receive the Inventory at the Destination Store
The receiving team should:
- Open the transfer
- Count what’s physically in the box
- Verify SKUs and barcodes
- Check for damaged or missing items
- Receive the transfer in the POS
9. Reconcile Any Difference
Say you sent 20 units and 19 arrived. Receive only the 19 that physically arrived through the transfer workflow, then investigate the missing unit. Don’t manually add or subtract stock unless your POS requires an adjustment after the discrepancy has been investigated. More on that below.
Can You Receive Part of a Transfer?
Often, yes. Shopify’s help center, for example, says transfers can be received in full or in part, which helps when a shipment is split or arrives in batches. Check whether your POS keeps the remainder open or closes it out.
What Happens to Inventory During a Store-to-Store Transfer?
Think of a transfer as a short journey with checkpoints. Here’s the typical flow:
Source Store → Transfer Created → Stock Picked → Shipped → In Transit → Destination Receives → Inventory Available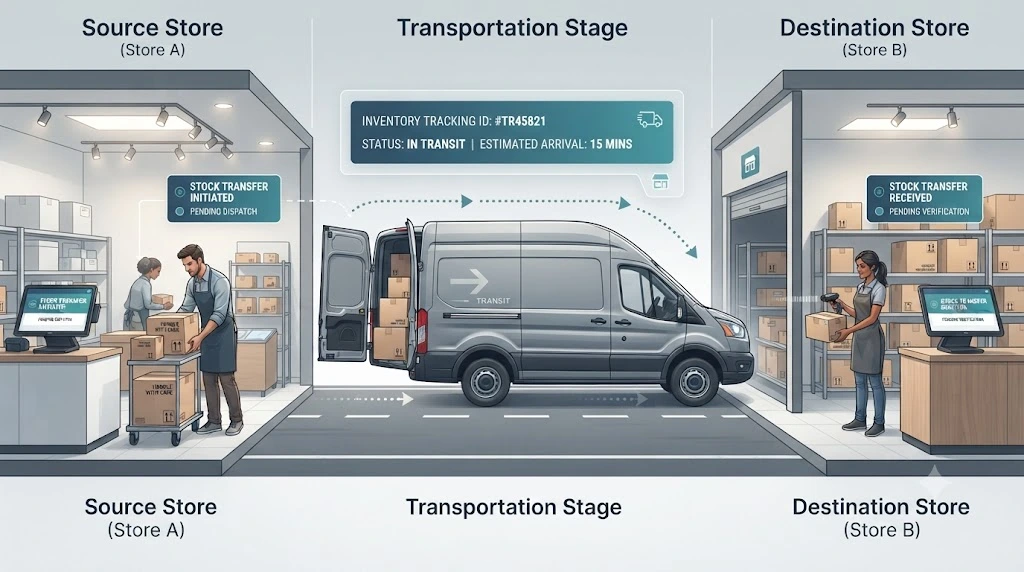
Three terms matter here:
- Available: stock that can be sold at a location right now.
- In transit: stock that has left the source but hasn’t been received yet.
- Received: stock at the destination has been counted and confirmed, which then becomes available there.
Some systems show an “in transit” status or count. Others skip it. Zoho Inventory, for example, sets a transfer order to In Transit when you initiate it, and the receipt is then recorded manually. Know which model your POS follows, and you’ll know why a number looks off.
What If the Received Inventory Doesn’t Match?
It happens, even in well-run stores. A good process turns surprises into small, fixable problems.
Short Shipment
You sent 20 and got 18. Receive 18, then investigate the other two. Check the packing area, the carrier, and any other open transfers before writing anything off.
Damaged Inventory
You received 20, but 2 are damaged. Record the damaged units separately from sellable stock, and keep photos if the carrier is involved.
Wrong Product or SKU
The transfer lists product A, but product B shows up. Don’t receive it as A. Note the mix-up, fix the record, and trace where the wrong item was picked.
Extra Inventory Received
You sent 19 and counted 20. That extra unit belongs to some other transfer or store. Find out which before it quietly corrupts two sets of numbers.
Missing Serialized Item
For high-value products, match serial numbers one by one on both ends. A missing serial number deserves a proper investigation, not a quick adjustment.
Inventory Transfer vs. Stock Adjustment vs. Purchase Order
These three get mixed up all the time. Using the wrong one muddies your records.
| Method | When to use it |
|---|---|
| Inventory Transfer | Moving stock from one store to another |
| Stock Adjustment | Correcting recorded quantities after a count discrepancy, loss, or damage |
| Purchase Order | Buying inventory from a supplier |
If you’re moving existing stock between your own locations, use a transfer. If you’re correcting the recorded quantity because of a count discrepancy, loss, damage, or another inventory correction, use the appropriate adjustment workflow. If the stock is coming from a supplier, use a purchase order.
How Much Inventory Should You Transfer?
Moving stock is easy. Moving the right amount is where the skill lies.
Look at Recent Sales.
Check how fast the product sells at the destination and at the source. Recent weeks tell you more than a single good day.
Check Minimum Stock Levels
If your POS lets you set minimums by location, use them as a starting line for what each store should hold.
Account for Safety Stock
Safety stock is the small buffer that covers delays and surprise demand. Leave it intact at the source, and build it at the destination.
Avoid Creating a Stockout at the Source
Fixing one store’s shortage by emptying another’s shelf just moves the problem. Check the source’s own sales before you commit.
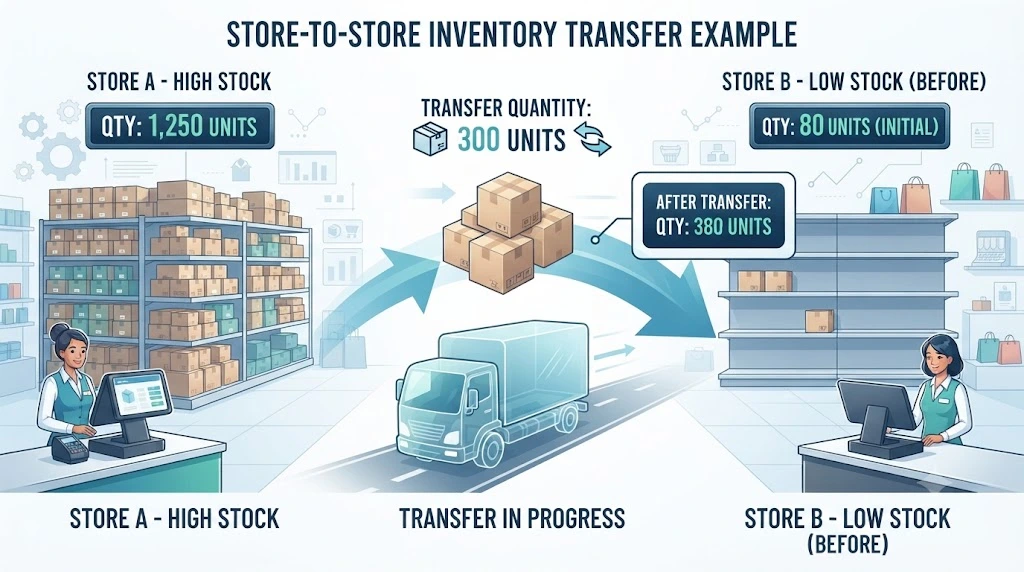
Worked example (illustrative, not a real transaction): Store A has 80 units. Store B has 10, sells about 15 a week, and wants to keep 10 as safety stock. To cover a week of sales plus that buffer, Store B needs 25 units, so the gap is 15. The basic gap is 15 units. A retailer might send 15, or a slightly higher quantity, depending on expected demand, transit time, and how much the source store has left. Sending 20 would leave Store A with 60; sending half of its stock (40) would likely be overkill.
A Real Example: How One Retailer Used Inventory Transfer Recommendations
Meny’s True Value, an Indiana hardware retailer, grew to three stores after buying a third location in Ferdinand in 2019. The stores had started life as separate operations, with different names, affiliations, and procedures. Even after they came together, moving stock between them stayed a headache.
Dalton Meny, the owners’ son and head of operations, built a program as part of a retail management certification project. It generates transfer recommendations for each store based on minimums, sales, and other factors, and those recommendations can be imported into the POS. He also set rules and procedures around the suggestions to avoid costly inventory discrepancies.
The program launched in August 2022. According to the report, it transferred more than $58,000 of inventory in its first nine months that would otherwise have sat on a shelf. Meny also said the stores were ordering less and could buy in larger case quantities.
What to take from it: These are figures reported by the retailer, and they come from one three-store business using a custom-built tool, so your results will differ. The takeaway isn’t the software. It’s the method: set minimums, look at sales by store, and follow clear rules before moving stock.
Source: Hardware Retailing, “Built-From-Scratch Program Eases Inventory Challenges”
How Different POS Systems Handle Inventory Transfers
Every platform uses its own vocabulary. This table summarizes what each vendor’s help documentation describes. Features and plan requirements change, so confirm the details in the current documentation before you build a process around them.
| POS | Transfer terminology and workflow | Official source |
|---|---|---|
| Shopify | Inventory transfers between locations. Transfers can be moved to in transit, marked ready to ship, or marked as transferred, and received in full or in part. | Shopify Help Center |
| Lightspeed (X-Series) | Stock transfers under Inventory > Stock control > Transfers. Sending removes stock from the source outlet; receiving adds it at the destination. | Lightspeed support |
| Cin7 Core | Stock transfers between locations, either instant or marked in transit. | Cin7 Core help |
| Square | “Transfer stock” in Square for Retail, completed in one step. The help article lists it for Square for Retail Plus and Premium subscribers. | Square support |
| Zoho Inventory | Transfer orders between warehouses, with an In Transit status when you initiate a transfer. At least two warehouses are required. | Zoho Inventory help |
Common Inventory Transfer Mistakes
Transferring Stock Without Checking Demand
Moving units on a hunch can leave the destination overstocked and the source short. Look at sales first.
Forgetting In-Transit Inventory
Inventory in transit is still your inventory, but your POS may report it separately from available stock. Track it explicitly so it doesn’t disappear from either location’s numbers.
Receiving the Transfer Without Counting
Clicking “receive all” feels efficient until a missing unit shows up months later. Count first.
Using Stock Adjustments Instead of Transfers
Adding stock at one store and subtracting it at another leaves no link between the two. A proper transfer keeps the paper trail intact.
Ignoring Damaged or Missing Items
Small differences add up. Record each one, even when the loss seems minor.
Not Keeping an Audit Trail
Transfer numbers, dates, and names of the people who sent and received make future disputes much easier to settle. Keep them.
What Should an Inventory Transfer Record Include?
A complete record makes audits and disputes far easier. Aim to capture:
- Transfer ID or reference
- Source location
- Destination location
- Product/SKU
- Quantity sent
- Date and time
- Person who created or sent it
- Shipment or tracking details, if applicable
- Quantity received
- Discrepancy notes
Store-to-Store Inventory Transfer Checklist
Print it, pin it up, or paste it into your team’s playbook.
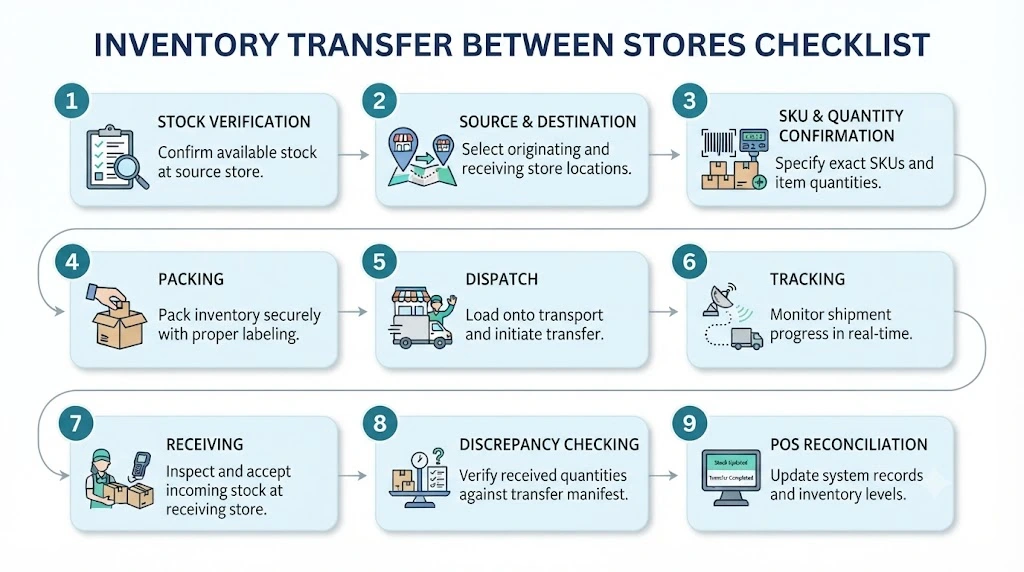
Before Sending
- Source location confirmed
- Destination confirmed
- SKU/variant verified
- Quantity checked
- Source stock level checked
During Transfer
- Products picked
- Barcode/serial numbers checked
- Transfer marked shipped
- Transfer reference recorded
At Receiving
- Quantity counted
- Product/SKU verified
- Damage checked
- Transfer received in POS
- Difference reconciled
Frequently Asked Questions
How do I transfer stock from one store to another?
Create a transfer in your POS, select the source and destination locations, add the products and quantities, and mark it as sent. When the stock arrives, the receiving store counts it and confirms the transfer. That’s the core process to transfer inventory from one store to another, even when menu names differ.
Can you transfer inventory between stores without a POS?
Yes, but manual spreadsheets or inventory logs make it harder to maintain synchronized stock levels, transfer history, and receiving records across locations. A POS or inventory system automates much of that process.
What happens to inventory while it is being transferred?
It depends on the POS. Some systems remove stock from the source when you send it and add it to the destination only when it’s received. Others complete the move in one step. Look for an “in transit” status or count in your own system.
What is the difference between an inventory transfer and a stock adjustment?
A transfer moves stock between your locations. An adjustment corrects a count at a single location, for example after a recount or a damage write-off.
Can I transfer only part of the inventory between stores?
Yes. You choose the quantity for each product on the transfer. Some systems also let the destination receive part of a transfer and handle the remainder separately.
How do I handle missing inventory after a store transfer?
Receive only what arrived, then investigate the difference. Check the packing area, carrier, and other open transfers. If the units can’t be found, record the loss through your POS’s adjustment process and note the transfer reference.
Do tax or documentation requirements change between locations?
They can, depending on your country, business type, and how your locations are registered. Check with your accountant, and look at your POS vendor’s documentation for any location-specific transfer rules.
Final Thoughts: Make Every Transfer Traceable
A reliable inventory transfer between stores is simple at its core: check demand, choose the right quantity, record the movement, track stock while it’s in transit, verify what arrives, and reconcile any difference. Once those steps are consistent, your POS becomes a dependable record of where inventory is and where it needs to go.
Still choosing or switching software? Start with our guide to a multi-location POS system.